Setting Up Git for GitHub on macOS
Whenever I am setting up my development environment on a fresh macOS install, one of the first things I need to do is configure Git to work with my GitHub account. Looking up all the steps required to do so continues to be an absolute pain each time. I’m writing this post to collect this information in one place, and publishing it in the hopes that someone else may find this useful.
This guide will cover the following aspects:
- Setting up user details
- Authenticating with 2FA enabled
- Ignoring .DS_Store files everywhere
- Enabling GPG commit signing
Authenticating
Update: GitHub CLI now supports authentication with gh auth login, which I would recommend using instead of the below instructions.
First, you’ll need to configure your name and email address in Git. If you’ve enabled the GitHub setting to keep your email address private, make sure to use your @users.noreply.github.com address here. I prefer to configure these settings globally, but you can also do this on a per-repository basis (omit the --global flag).
git config --global user.name "Your Name"
git config --global user.email you@example.com
When you try to push to a GitHub repository or clone a private repo, Git will prompt you for your credentials. If you aren’t using two factor authentication, then you can enter your GitHub username and password as usual. If you are using 2FA (you probably should be), then you’ll need to generate a personal access token.
You can find the relevant page on GitHub under Settings → Developer → Personal access tokens. From here, you can generate a new token. Give your new personal access token a name, and select the “repo” scope.
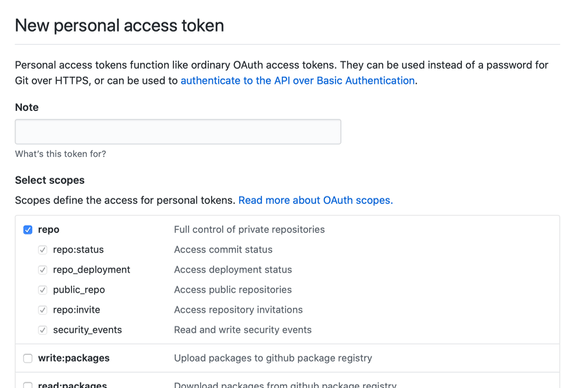
Make sure that you copy the token! This is the only time that you’ll be able to see it. Now, try to sign in from the command line as usual, but use your new personal access token instead of your password.
Your password (or token) should have been automatically saved in macOS’s Keychain. For more information on this, see this GitHub support article.
Ignoring .DS_Store Files
macOS stores folder metadata in files named .DS_Store. You generally don’t want these files to be checked in to Git. You could just ignore these by adding them to a repository’s gitignore file (or .git/info/exclude), but you end up needing to do this for every single repo. Luckily, there’s a better way.
In addition to the gitignore file in a repository, Git also allows you to configure a global ignore list. This is the perfect place to exclude .DS_Store files.
git config --global core.excludesfile ~/.gitignore
echo ".DS_Store" >> ~/.gitignore Signing Commits
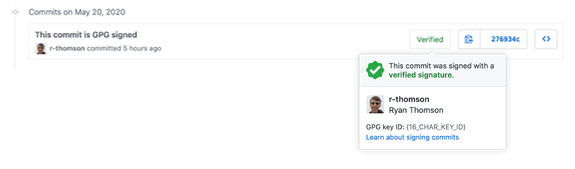
Git allows commits to be signed to verify their authenticity. When you sign your commits, GitHub will show the green “Verified” badge beside them. To set this up, you’ll first need to install the gpg command line tool.
brew install gnupgYou’ll also run into problems unless you add the following statement to your dotfiles (.zshrc, .bash_profile, etc).
export GPG_TTY=$(tty)This step is optional, but I prefer to store my key’s password in macOS’s keychain. This can be accomplished by installing another package called pinentry-mac. Then, set that as the default pinentry program for GPG.
brew install pinentry-mac

# If the directory does not exist, run gpg first
echo "pinentry-program /usr/local/bin/pinentry-mac" \
	> ~/.gnupg/gpg-agent.conf

# You may need to restart the GPG agent
gpgconf --kill gpg-agent
Now, you can generate your GPG key by running the following command.
gpg --full-generate-key- For the kind of key, select RSA and RSA
- For key size, enter 4096
- For expiration, select “does not expire”
- For name and email address, use the same as for Git
- For comment, enter nothing
You’ll also be asked to set a password for your key. You’ll need to use this password the next time you try to sign something with that key. This is also when you’ll have the option to save your key to the Keychain.
Type the following command, and you should be able to see your new key.
gpg --list-secret-keys --keyid-format longThe output should look like this:
pub   rsa4096/{16_CHAR_KEY_ID} 2020-05-20 [SC]
      08DFF92EF8BD66001A87041DFDB80C86B5FC6F50
uid                 [ultimate] Your Name <you@example.com>
sub   rsa4096/8C507D260AECD8A6 2020-05-20 [E]
Now, you need to configure Git to use your new key to sign commits. Again, I prefer to configure this globally.
git config --global commit.gpgsign true
git config --global user.signingkey {16_CHAR_KEY_ID}
Finally, you’ll need to add this key to GitHub. Run the command below to copy your new public key to the clipboard. Then, navigate to Settings → SSH and GPG Keys on GitHub, where you can add the GPG key to your account.
gpg --armor --export {16_CHAR_KEY_ID} | pbcopyThe next time you make a commit and push it to GitHub, you should be able to see a nice green “Verified” badge in the history.